-
Whatsapp: +86 15938761000
-
Email: likang@shconcretemixer.com
-
Address: Shenglong Youyi City, Zhongyuan District, Zhengzhou City, Henan Province
-
Whatsapp: +86 15938761000
-
Email: likang@shconcretemixer.com
-
Address: Shenglong Youyi City, Zhongyuan District, Zhengzhou City, Henan Province

How to Set Up a Concrete Batching Plant
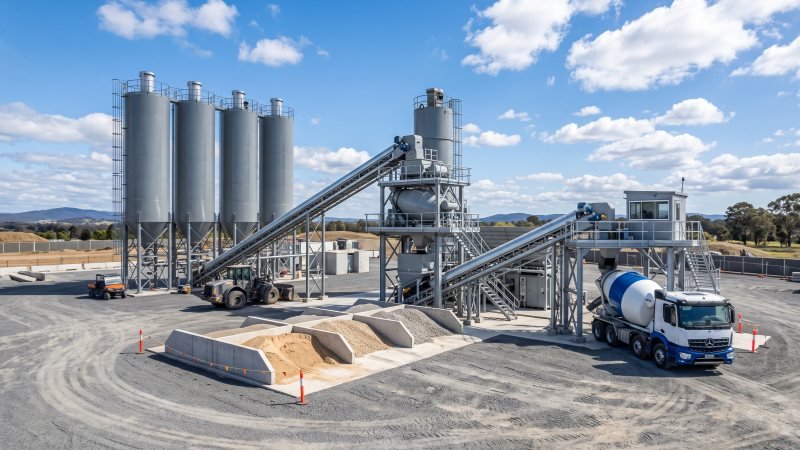
What are the essential steps required to successfully install and operate a new concrete batching plant on your construction site?
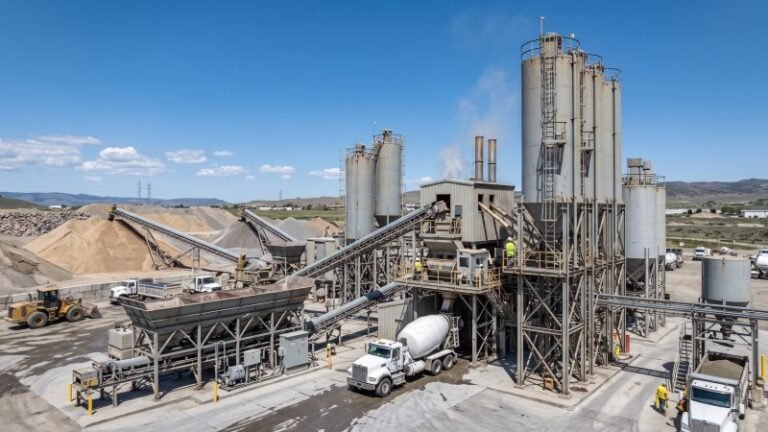
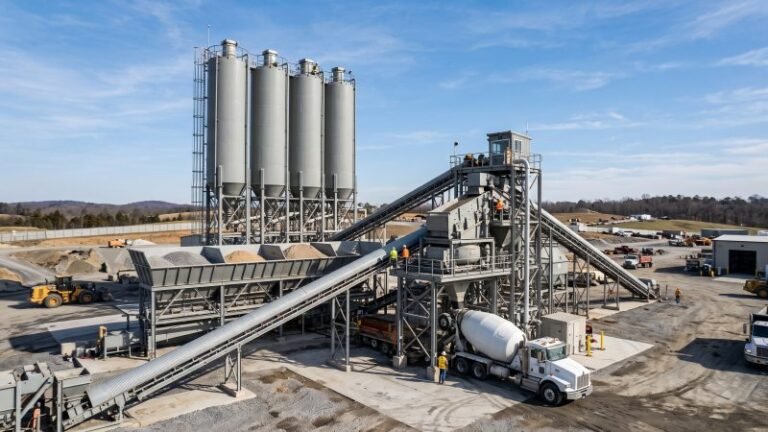
To set up a concrete batching plant, you must systematically execute comprehensive pre-installation planning, construct a solid concrete foundation, and safely assemble the mechanical silos and mixers. Following assembly, you must connect all utility lines, calibrate the electronic scales, and establish daily maintenance protocols.
Essential Pre-Installation Planning
Careful pre-installation planning ensures a smooth transition from a vacant lot to a fully operational production facility.
This phase involves evaluating your site layout for smooth traffic logistics, securing mandatory environmental permits, and selecting the right machinery type to clearly meet your daily production goals.

Assessing Site Requirements and Layout Space
Proper site planning prevents massive operational delays. First, you need enough physical space. A standard stationary plant layout generally requires between 1 to 3 acres of land, depending on your material storage needs.
How do trucks enter and exit? Traffic flow is critical. Just like designing an aggregate stockpile at a quarry, you must avoid heavy equipment bottlenecks. Transit mixer trucks need a wide turning radius, typically around 40 to 50 feet. If trucks cannot turn easily, daily production slows down significantly.
You also need distinct, separated zones for your raw materials. Sand, gravel, and cement storage require significant room with clear access for loader equipment.
Typical Site Space Allocation
| Site Zone | Primary Purpose | Space Requirement Level |
|---|---|---|
| Aggregate Stockpile | Storing sand and various gravel sizes | High (Requires ramp access) |
| Plant Core | Housing silos, mixers, and conveyors | Medium (Requires height clearance) |
| Traffic Routes | Loading, unloading, and truck turning | High (Crucial for daily speed) |
| Washout Area | Cleaning trucks and managing wastewater | Low to Medium |
Securing Necessary Permits and Environmental Approvals
Do you know how much a sudden project halt can cost due to a missing permit? Fines can quickly destroy your entire project budget. Therefore, securing legal approvals is mandatory before any dirt is moved.
First, check local zoning laws to ensure heavy industrial machinery is legally allowed on your chosen plot. Next, focus heavily on environmental rules. Batching concrete naturally creates dust and wastewater.
You will likely need a specific air quality permit, as cement silos utilize filter dust collectors to prevent air pollution. Local agencies will strictly monitor these emissions. Furthermore, a water discharge permit is vital. Washing out transit mixer trucks generates contaminated, high-pH water. You must plan for dedicated washout pits and water recycling systems to meet local standards.
Selecting the Right Plant Type for Your Project
Not all batching plants do the exact same job. You must carefully match the machinery to your specific project needs.
Are you moving the plant frequently? A mobile batching plant is your best choice. Mobile units sit on a wheeled chassis, making them perfect for temporary highway construction sites. Conversely, stationary plants are built for long-term use and reliably produce larger volumes of concrete for major commercial building projects.
Next, consider the concrete mixing method. Dry mix plants only weigh the materials and load dry ingredients directly into a transit mixer truck, where water is added later. Wet mix plants feature a central twin-shaft mixer. They mix all materials, including the water, before loading the truck. Wet plants consistently offer better quality control over the final mix.
Production capacities vary widely in this industry, often ranging from 25 to over 180 cubic meters per hour depending on the exact model.
Batching Plant Type Comparison
| Plant Type | Best Used For | Setup Speed | Typical Output Consistency |
|---|---|---|---|
| Stationary Wet Mix | Large, permanent commercial projects | Slow (Weeks) | Very High (Central mixing) |
| Stationary Dry Mix | Wide delivery radius operations | Slow (Weeks) | Medium (Mixed in truck) |
| Mobile Wet Mix | Short-term road or bridge projects | Fast (Days) | High |
Constructing a Solid Foundation
A massive concrete batching plant requires a stable foundation that prevents sinking or structural shifting over its lifetime.
To achieve this, you must completely level the ground, pour high-strength concrete with perfectly aligned anchor bolts, and strictly follow required curing times before installing any heavy machinery.

Land Leveling and Excavation Basics
Before laying any concrete, you must prepare the raw earth. First, construction crews must remove all soft topsoil, which contains organic matter that decays and shrinks under heavy loads.
Next, you must compact the subgrade soil. Similar to preparing a new highway sub-base with a heavy vibratory roller, compacting the soil removes air gaps and prevents future settling. If the sub-base is weak, the foundation will quickly crack.
After proper compaction, excavation begins. Workers dig deep trenches and pits for the main equipment footings. The exact depth of these excavations depends heavily on your local soil bearing capacity and engineering blueprints.
Pouring Concrete and Setting Anchor Bolts
Once excavation is complete, workers build wooden formwork and tie heavy steel rebar into dense grids. This rebar grid provides essential tensile strength to the concrete foundation block.
During the concrete pour, setting the anchor bolts is the most critical task. Anchor bolts directly connect the heavy steel plant structure to the concrete pad.
“A misalignment of just half an inch in your anchor bolts can completely prevent a 100-ton cement silo from bolting onto its foundation.”
You must use precise laser levels and steel templates to position these bolts accurately. Because bolt spacing and diameter vary greatly depending on the specific equipment, always verify the exact anchor bolt layout with your machinery supplier before pouring the concrete.
Curing Time and Structural Integrity Checks
Pouring the foundation is only half the battle; the fresh concrete must slowly gain its structural strength through curing. Workers often cover the foundation with wet burlap or plastic sheets to trap essential moisture and prevent surface cracking.
While concrete typically takes 28 days to reach its full design strength, equipment installation can often begin after 7 to 14 days if early-strength cement mixtures are used and local structural engineers approve.
Common Foundation Quality Checks
| Test Type | What It Measures | Importance Level |
|---|---|---|
| Slump Test (During Pour) | Workability and water ratio of wet concrete | High |
| Compressive Strength Test | Load-bearing capacity of cured concrete cylinders | Critical |
| Laser Level Survey | Absolute flatness of the finished foundation pad | High |
Before any steel beams arrive, survey the foundation one last time to ensure every anchor bolt matches the blueprint perfectly.
Mechanical Equipment Assembly Process
The mechanical assembly process demands strict adherence to safe rigging and lifting protocols.
You must sequentially erect the tall cement silos, position the aggregate batcher and main mixer, and finally connect these structures by installing the inclined screw conveyors and sensitive weighing systems.
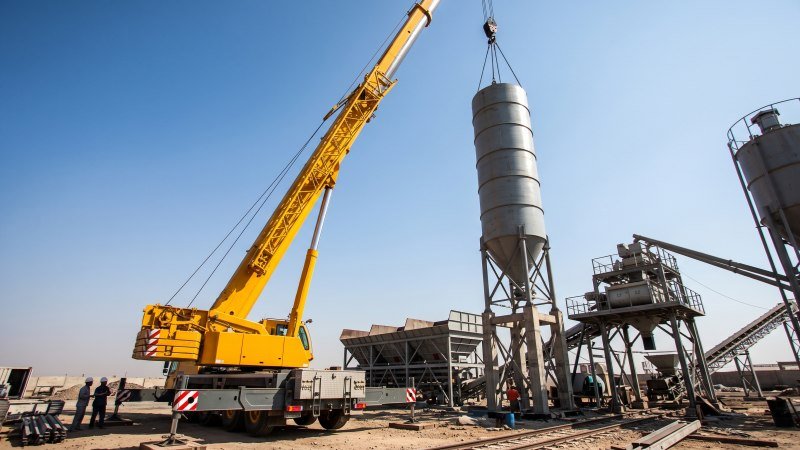
Erecting the Cement Silos Safely
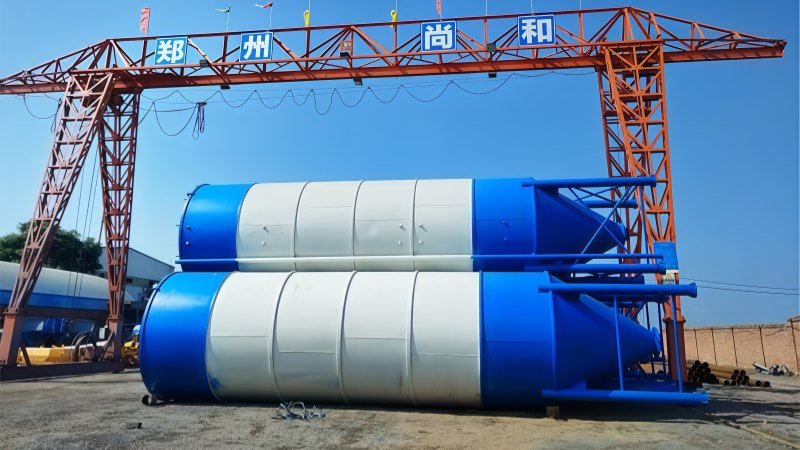
Lifting the cement silos is the most hazardous task during plant setup. First, workers assemble the silo body, dust collector, and safety guardrails on the ground. Next, a heavy-duty mobile crane hoists the entire steel cylinder into the air.
Much like erecting a tower crane mast, the center of gravity must be perfectly managed. Even a mild wind can cause the suspended silo to swing violently. Riggers use thick steel taglines to guide the silo onto the foundation slowly. Once lowered, workers immediately secure the silo legs to the pre-installed anchor bolts.
Critical Silo Lifting Checks
| Check Item | Purpose | Priority Level |
|---|---|---|
| Wind Speed | Prevents dangerous swinging during the crane lift | Critical |
| Lifting Lugs | Ensures rigging hardware will not snap under tension | Critical |
| Leg Alignment | Matches the silo base to the foundation anchor bolts | High |
Positioning the Main Mixer and Batching Machine
After securing the silos, you move on to the core production components. The aggregate batching machine holds your sand and gravel and is placed in a designated zone, usually with a loading ramp for front-end wheel loaders.
Next, you assemble the main mixer platform. Twin-shaft mixers are extremely heavy, often weighing over 8 tons empty. Cranes must lower the mixer gently onto its support frame.
Similar to installing a massive jaw crusher in a rock quarry, if the steel chassis is not perfectly level, the intense daily vibration will prematurely destroy the internal motor bearings. Workers use specialized laser alignment tools to ensure the mixer sits completely flat before tightening the heavy-duty mounting bolts.
Installing Screw Conveyors and Weighing Systems
With the major structures in place, cranes lift the heavy tubular screw conveyors into the air. Workers bolt the top end to the silo discharge gate and attach the bottom end to the cement weighing hopper above the mixer. These conveyors act as steel pipes that transport raw cement powder at an incline (typically 25 to 45 degrees).
Finally, you install the weighing systems. These use electronic load cells to weigh cement, water, and chemical additives. Load cells are highly sensitive industrial sensors. You must mount them carefully beneath the weighing hoppers. Never drop a load cell or strike it with a hammer, as a bent sensor will permanently ruin your concrete mix ratios.
Connecting Utilities and Control Systems
Powering and automating the heavy components of a batching plant requires precise utility connections.
This process involves routing high-pressure pneumatic lines and water pipes, wiring the main electrical cabinets for safe power distribution, and configuring the operator control room to manage the automated sequence.

Routing Water and Pneumatic Lines
After the steel structures stand tall, technicians install the main air compressor. Compressed air is the invisible muscle of the batching process. Just like hydraulic fluid powers the heavy boom of an excavator, compressed air quickly opens and closes the discharge gates on your aggregate hoppers.
If air pressure drops suddenly, a cement gate might only open halfway, causing a major delay in material flow. Therefore, you must use durable, thick-walled pneumatic hoses connected securely. Plant air compressors typically operate between 0.7 and 0.9 MPa.
Similarly, you must connect heavy-duty water pumps to your main supply tanks. These pumps push water through digital flow meters directly into the twin-shaft mixer. All water pipes must be properly sealed to prevent leaks.
Utility Line Requirements
| Utility Type | Primary Function | Potential Failure Risk |
|---|---|---|
| Pneumatic Air | Actuates steel hopper gates and valves | Slow material discharge |
| Water Supply | Provides essential hydration for the mix | Incorrect concrete slump |
Wiring the Electrical Cabinets
A concrete batching plant requires massive amounts of electricity to run the mixer motors and conveyor belts. Certified industrial electricians must route thick copper power cables from the local power grid to the plant’s main electrical cabinet. These cables must run inside underground PVC conduits to protect them from heavy wheel loaders driving overhead.
Next, electricians wire the main control panel, which houses dozens of contactors, breakers, and safety relays. Wiring this panel is very similar to wiring the main distribution board for a high-capacity rock crushing plant. Everything must be perfectly organized and clearly labeled.
“A single loose ground wire in the electrical cabinet can cause erratic scale readings, instantly ruining your entire concrete mix ratio.”
Always verify the exact voltage requirements (such as 380V or 440V three-phase power) with the manufacturer before running main cables. Furthermore, establishing a deep, secure grounding rod is mandatory to protect the electronic load cells from lightning strikes.
Setting Up the Operator Control Room
The operator control room is the brain of your operation. Usually a climate-controlled steel cabin, it sits elevated to give the operator a clear line of sight to the transit mixer trucks below.
Inside, you install the primary computer system and the Programmable Logic Controller (PLC), which reads data from the weighing scales and controls the electrical cabinet. Operating this centralized software is much like monitoring the automated control screen of a modern asphalt mixing plant.
Technicians set up the automated batching software alongside a manual override desk. If the computer system ever crashes, the operator can still use physical buttons to manually control the plant gates and finish loading a waiting truck.
System Calibration and Initial Testing
Before full production begins, rigorous testing is mandatory to guarantee mix quality and prevent raw material waste.
You must precisely calibrate all electronic scales, run dry tests to identify mechanical errors, and mix an initial wet batch to verify concrete slump and overall system performance.

Calibrating Scales for Precise Material Ratios
After physical assembly, you must calibrate the electronic load cells for cement, aggregates, water, and chemical additives. Calibrating these sensitive scales is critical; if the scale is off by even one percent, your final product will fail strict structural tests.
Technicians place certified cast iron test weights directly onto the empty weighing hoppers and compare the physical weight against the digital reading on the central computer. If there is a discrepancy, they immediately adjust the software parameters. Engineering regulations often mandate a strict weighing accuracy of ±1% for cement and ±2% for aggregates.
Running Dry Tests and Identifying Errors
Before loading any costly cement or sand, you must run the entire system completely empty. Running this “dry test” is highly similar to test-running a newly installed quarry conveyor belt before loading it with heavy rocks. You are actively checking for mechanical binding, correct motor rotation, and proper pneumatic gate operation.
The operator runs a simulated batch from the control room. You must watch the aggregate hopper gates open and close and listen carefully to the mixer motors for unusual grinding noises. You must also check all electrical limit switches, which tell the computer when a gate is fully closed. Document every single error and adjust the mechanical linkages immediately.
Common Dry Test Checks
| Component | Action Checked | Potential Issue If Ignored |
|---|---|---|
| Pneumatic Gates | Opening and closing speed | Stuck valves causing material jams |
| Mixer Motors | Correct rotation direction | Reverse mixing damaging internal blades |
| Limit Switches | Accurate position reporting | Sequence freezing mid-batch |
The First Wet Batch and Slump Testing
Now you are ready to load aggregates, cement, and water to produce your first wet batch. Set the computer to a standard concrete recipe and start the automated sequence. Standard mixing time usually ranges between 30 and 60 seconds once all materials enter the main mixer.
After mixing, discharge the fresh concrete into a waiting transit mixer truck and immediately perform a standard slump test.
“A slump test accurately measures the workability and water-cement ratio of your fresh concrete before it leaves the plant.”
Fill a standard metal slump cone with the wet concrete, lift the cone straight up, and measure exactly how far the wet concrete drops. If it slumps too much, the mix has too much water and lacks strength. If it barely moves, the mix is too dry. Adjust the water parameters in your control software based directly on this crucial test.
Establishing Daily Operations and Maintenance Protocols
Long-term profitability relies entirely on consistent equipment uptime and preventing unexpected breakdowns.
To ensure reliable daily performance, establish clear standard operating procedures for your control room staff to prevent errors, and enforce a strict routine for cleaning and component lubrication.
Standard Operating Procedures for Operators
Before hitting the start button, operators must follow a strict daily checklist, just like a heavy equipment operator thoroughly inspecting a loader before a long shift. First, operators must manually check the main air compressor pressure; if it is too low, the aggregate gates will fail to open.
Workers must visually verify raw material levels, as running a cement silo completely empty can damage the screw conveyor motors. During production, operators must constantly monitor the digital load cell readouts.
“A well-trained operator catches a frozen scale reading instantly, saving entire batches of concrete from being rejected.”
If a sensor fails, the operator must immediately use the manual override controls or initiate an emergency stop. Clear, written procedures keep your plant running safely.
Routine Cleaning and Component Lubrication
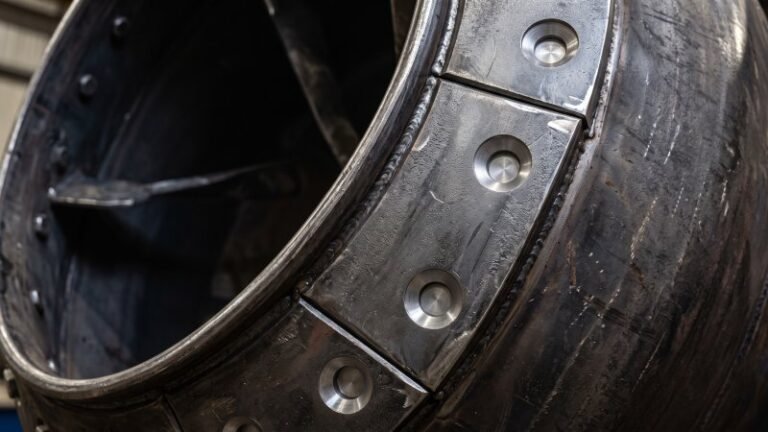
Concrete is highly abrasive and fast-hardening, making daily cleaning absolutely mandatory. At the end of every shift, workers must use high-pressure water hoses to blast wet concrete away from the mixing blades and liner plates inside the twin-shaft mixer.
If left overnight, this wet concrete will cure into solid rock. Chipping hardened concrete out with jackhammers wastes valuable time and severely damages expensive internal steel components.
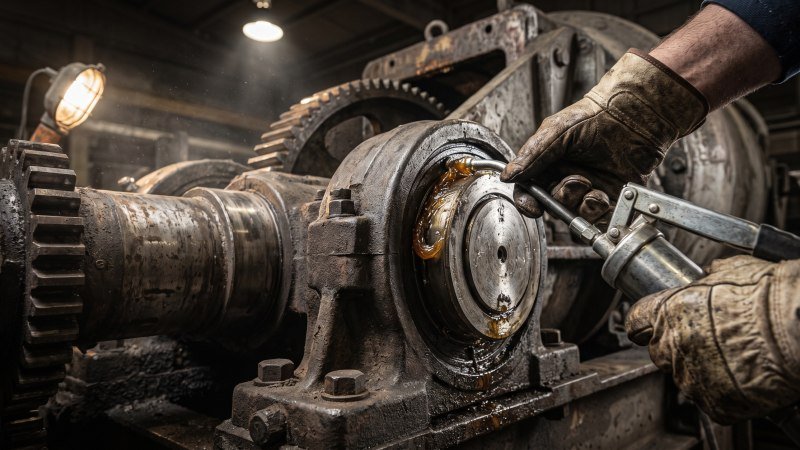
Additionally, focus on component lubrication. The main mixer relies on heavy-duty shaft seals and mechanical bearings that face intense friction and thick cement dust daily. You must pump fresh industrial grease into these bearing points frequently, following the manufacturer’s specific maintenance schedule.
Standard Daily and Weekly Maintenance Tasks
| Task Category | Specific Action Required | Recommended Frequency |
|---|---|---|
| Mixer Cleaning | Wash internal blades and discharge gate with high-pressure water | Daily (End of shift) |
| Pneumatic System | Drain excess condensation water from the air compressor tank | Daily |
| Component Lubrication | Apply industrial grease to main mixer shaft seals and conveyor bearings | Weekly |
| Visual Inspection | Check all heavy rubber conveyor belts for tears or improper alignment | Weekly |
Conclusion
Setting up a concrete batching plant requires a methodical approach, transitioning smoothly from initial site planning and foundation work to complex mechanical assembly and precise software calibration. By following the standardized steps outlined in this guide and adhering strictly to your daily maintenance protocols, you significantly reduce machine wear and guarantee consistent concrete production quality for years to come.
If you have any questions about configuring your specific setup or need further assistance optimizing your plant’s operation, please feel free to contact us.