-
Whatsapp: +86 15938761000
-
Email: likang@shconcretemixer.com
-
Address: Shenglong Youyi City, Zhongyuan District, Zhengzhou City, Henan Province
-
Whatsapp: +86 15938761000
-
Email: likang@shconcretemixer.com
-
Address: Shenglong Youyi City, Zhongyuan District, Zhengzhou City, Henan Province
The Ultimate Concrete Batching Plant Maintenance Checklist
What are the most critical things to check at a concrete batching plant to maintain production and safety?
To keep a concrete batching plant running smoothly, operators must execute a structured maintenance checklist that covers daily safety interlocks, mixing blade wear, scale calibration, and dust collector health. Regularly inspecting these core systems prevents costly mechanical breakdowns, guarantees accurate concrete mix proportions, and ensures full compliance with environmental safety standards.
Daily Pre-Start Inspections for Safety and Operation
Executing a strict daily walk-through is the most effective way to prevent accidents and avoid costly downtime before starting your concrete batching plant each morning.
Specifically, this routine requires testing all emergency stop circuits. You must also visually verify oil levels and bleed moisture from the main air compressors to protect the pneumatic systems.

Verifying Safety Guards and Emergency Stops
Safety always comes first in any heavy industrial setting. Therefore, a physical inspection of machine guards is mandatory before applying power. Are all moving parts properly shielded? Missing metal guards on rotating shafts or conveyor pinch points pose severe physical risks. For instance, just like a safety interlock prevents a rock crusher from running while open, your plant’s guards keep workers safe from spinning machinery.
Furthermore, emergency stop (E-stop) buttons require daily testing. You must ensure that pressing an E-stop immediately kills power to the entire plant. Over time, concrete dust accumulation can jam these mechanical switches. Consequently, a faulty E-stop might fail during a real mechanical emergency.
- Visual Check: Ensure no metal guards are loose, bent, or missing.
- Function Test: Manually press E-stops on the main control panel and all field stations.
- Reset Verification: Confirm the system will not restart until the E-stop is manually reset.
Checking Oil Levels and Key Lubrication Points
Proper lubrication prevents metal-to-metal contact. Without it, expensive mechanical parts will destroy themselves quickly. Therefore, you must check oil levels every single day.
First, locate the sight glasses on your main gearboxes and air compressors. The oil level should sit right in the middle of the glass gauge. If it looks low, top it up immediately with the recommended gear oil (such as ISO VG 220, depending on your climate and machine model).
Next, inspect the automatic grease pumps. Do they have enough grease for the entire day of production? Furthermore, carefully check the main grease lines for visible leaks or blockages.
| Inspection Point | What to Look For | Action Required if Failing |
|---|---|---|
| Gearbox Sight Glass | Oil level is below the center line. | Add the specified industrial gear oil. |
| Auto Grease Pump | Grease reservoir is almost empty. | Refill the grease reservoir immediately. |
| Lubrication Hoses | Visible cracks or actively leaking grease. | Replace the damaged line before starting. |
Draining Moisture from Air Compressors and Pneumatic Lines
Pneumatic systems provide the required muscle to open and close heavy gates. As a result, clean and dry air is critical for smooth operation. However, air compressors naturally generate water condensation as they compress atmospheric air.
Why is this trapped moisture a problem? First, water inside air lines causes rapid internal rust. Second, this rust creates debris that ruins sensitive pneumatic cylinders. Moreover, in freezing weather, trapped water will turn to ice. Think of it like water freezing in the pneumatic brake lines of a concrete transit mixer. It destroys system pressure and causes dangerous, erratic failures that will shut down your plant.
Therefore, you must drain the main air tanks daily. Most industrial tanks feature a manual drain valve at the very bottom.
- Open the bottom drain valve slowly at the start of your shift.
- Let the mixture of water and oil spray out safely.
- Close the valve tightly as soon as only dry air comes out.
Additionally, check the inline moisture separators. If the clear collection bowl is full, empty it immediately. Consistently removing this water greatly extends the life of your entire pneumatic system.
Core Mixing and Conveying System Maintenance
Maintaining a concrete plant’s core mixing and conveying systems is critical to running operations continuously without sudden breakdowns.
To maintain these core systems, operators must systematically evaluate the components subjected to the most friction. This involves measuring mixer blades and liners for excessive wear, inspecting twin-shaft seals to block abrasive slurry leaks, and correctly tensioning conveyor belts for smooth material transport.
Inspecting Mixer Blades and Liners for Wear
Aggregates like crushed stone and sand are highly abrasive. Therefore, they constantly grind against the mixer blades and internal liners. Are you checking these wear parts regularly? If you ignore them, your mixing efficiency will drop drastically.
Think of a front-end loader scooping heavy gravel at your aggregate bins. The hardened steel cutting edge wears down over time. If you do not replace that edge, the actual bucket frame gets completely destroyed. Similarly, severely worn mixer blades lead to permanent damage to the main mixer drum.
Usually, technicians maintain a clearance gap of roughly 5mm to 8mm between the mixing blade and the liner. If the gap becomes too large, coarse stones can wedge tightly between the blade and liner. Consequently, this jams the mixer and can burn out the main drive motor.
| Wear Indicator | Visible Symptom | Required Action |
|---|---|---|
| Blade Gap | Gap exceeds manufacturer maximum limit. | Adjust blade outward or replace blade completely. |
| Liner Thickness | Liner is worn past 50% of original thickness. | Schedule liner plate replacement. |
| Missing Bolts | Fasteners securing the blades are sheared off. | Stop immediately and install new hardened bolts. |
Evaluating Shaft Seals to Prevent Slurry Leaks
Twin-shaft concrete mixers utilize heavy-duty bearings to turn the thick mixing arms. However, these critical bearings sit dangerously close to the wet concrete slurry. Cement slurry acts exactly like liquid sandpaper. Therefore, reliable shaft seals are critical to keep this abrasive mix out of the clean bearings.
This concept is identical to the material cylinders on a concrete boom pump. If the internal seal fails, abrasive grout floods the housing and destroys the expensive mechanical components. In a concrete mixer, a failed seal quickly ruins the main shaft bearing. Consequently, this specific failure forces a complete plant shutdown for several days.
Most modern plants use an automated grease pump to pressurize these seals continually. The thick grease acts as a physical barrier against the wet cement paste. You must visually inspect the shaft ends during your maintenance routine. Are you seeing gray slurry dripping from the seal housings? If so, the internal seal has failed.
Furthermore, always monitor the grease pump pressure. A typical automatic system requires a working pressure of around 20 to 30 MPa to push grease through the narrow seal galleries.
Aligning and Tensioning the Conveyor Belt
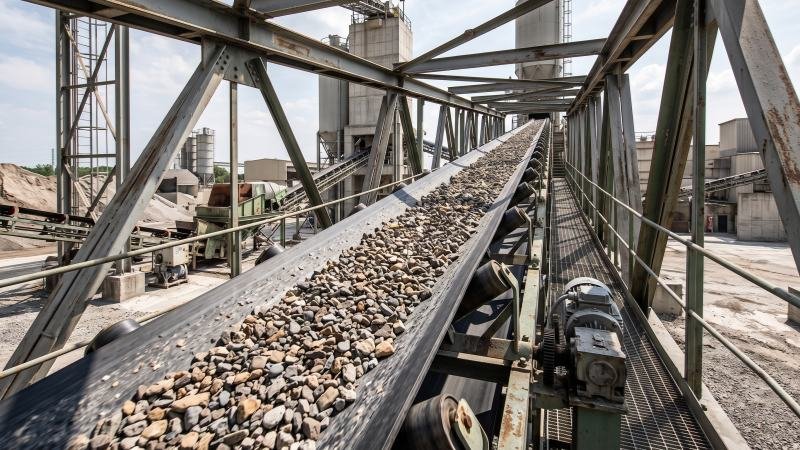
The main incline conveyor transports thousands of tons of raw aggregate to the holding hoppers. Consequently, this rubber belt endures massive tension and constant heavy impacts. Proper alignment and tensioning are absolutely essential for continuous, safe operation.
If a belt loses tension, the main drive pulley will slip. This slippage burns the rubber belt and stalls your production entirely. Conversely, applying too much tension destroys the expensive pulley bearings. Furthermore, if the belt is misaligned, it will constantly drift to one side. This drifting causes costly material spills and shreds the outer edges of the belt against the steel conveyor frame.
To maintain proper alignment, technicians must carefully adjust the threaded tensioning bolts on the tail pulley. You must make these adjustments in very small increments.
| Conveyor Issue | Probable Cause | Maintenance Solution |
|---|---|---|
| Belt Slipping | Insufficient tension or wet drive pulley. | Tighten tail pulley bolts equally on both sides. |
| Belt Drifting Left | Tension is uneven (left side is too loose). | Tighten the left-side tension bolt slightly. |
| Edge Fraying | Belt is rubbing against the steel frame. | Re-align the belt and check for seized idler rollers. |
Ensuring Batching Accuracy and Quality Control
Consistently guaranteeing the exact proportion of materials in every concrete batch relies entirely on the health of your weighing and discharge systems.
To ensure precise batching accuracy, operators must routinely calibrate the electronic load cells on all weighing hoppers. Furthermore, you must verify that pneumatic discharge gates seal completely to prevent material leakage, and regularly test silo material level indicators for accurate inventory tracking.
Calibrating Load Cells and Weighing Hoppers
Load cells are the electronic sensors that weigh your sand, gravel, and cement. Over time, heavy plant vibrations cause these sensitive devices to drift out of calibration. Are your sensors reading accurately today? If a scale is off by just 2%, you could be giving away free cement.
If an aggregate scale is consistently weighing light, the resulting mix will be overly rich in cement, wasting your money. Conversely, if it weighs heavy, the concrete will lack the required strength and fail structural cylinder tests. Uncalibrated batch plant scales lead directly to dangerous mix proportions and rejected loads.
Therefore, you must calibrate your weighing hoppers regularly using certified cast-iron test weights. Typically, industry standards recommend a full-scale calibration every three to six months, depending on local regulatory requirements.
During the physical calibration process, inspect the hopper suspension bolts. They must be completely free of binding or rubbing against the main frame, which can artificially alter the weight reading.
Testing Pneumatic Discharge Gates for Complete Closure
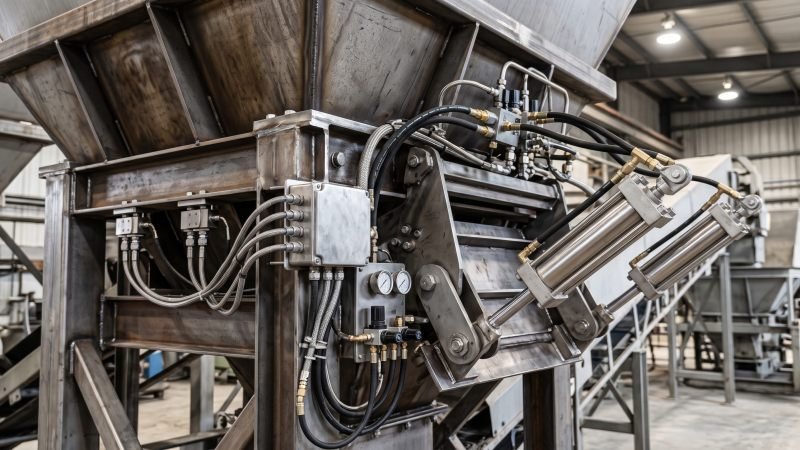
Pneumatic discharge gates control the rapid flow of materials from the hoppers into the main mixer. What happens if a gate does not close completely? Aggregate or cement will slowly leak into the mixer drum. Consequently, this hidden leakage completely ruins your carefully measured batch proportions.
This mechanical issue is very similar to an aggregate dump truck with a damaged tailgate latch. If the tailgate does not lock tightly shut, valuable gravel constantly spills out onto the haul road. In your batch plant, a leaking gate spills expensive cement directly into the wrong concrete batch.
Usually, sticky material buildup or worn rubber edge seals cause this specific problem. You must physically inspect the rubber gate seals for deep tears. Additionally, check the air pressure in the pneumatic cylinders that drive the gates. They must have enough force to push the heavy metal gates tightly shut.
Finally, test the magnetic limit switches on the cylinders. These small switches tell the plant computer when the gate is fully closed. If the switch vibrates out of position, the computer receives false data.
Verifying Material Level Indicators in Silos
Material level indicators sit securely inside your large cement and fly ash silos. They prevent you from accidentally overfilling the silo during a delivery. Furthermore, they warn the operator before you run out of powder mid-batch.
Imagine a bulk pneumatic cement tanker trying to offload into a silo with a broken high-level indicator. Without that critical warning, the operator will overfill the silo, blowing the pressure relief valve and causing a massive environmental spill. Broken silo indicators can halt your entire concrete production process completely unexpectedly.
Cement dust is extremely fine and naturally sticky. Therefore, it easily coats the rotating mechanical paddles or vibrating forks of the level sensors. When these electronic sensors get caked in hardened dust, they freeze in place permanently. As a result, they send incorrect empty or full signals to the main control room.
You must safely access the top of the silo periodically to inspect these probes. Carefully remove any hardened cement buildup from the sensing elements.
| Sensor Type | Common Failure Mode | Required Maintenance Action |
|---|---|---|
| Rotary Paddle | Paddle jams securely due to hardened cement dust. | Remove sensor and wire-brush the paddle completely clean. |
| Tuning Fork | Sticky material bridges across the vibrating forks. | Clean the metal forks and verify the vibration frequency. |
| Radar Level | Thick dust clouds interfere with the signal reading. | Wipe the sensor lens with a dry, clean cloth. |
Environmental Control and Deep-Check Priorities
Specific long-term maintenance tasks exist to protect both your local environment and your heavy machinery from catastrophic failure.
To safeguard the environment and ensure long-term plant reliability, technicians must prioritize deep-checking core infrastructure. You must systematically clean pulse dust collectors to meet air quality standards, meticulously inspect electrical control cabinets for loose wiring, and actively evaluate main gearboxes and motors for destructive vibration and heat.
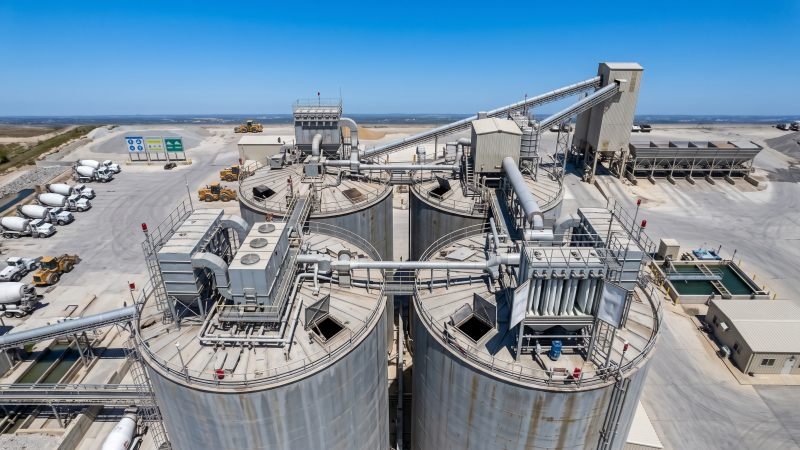
Cleaning Pulse Dust Collectors and Filter Bags
Cement storage generates massive amounts of airborne dust. Therefore, environmental control is absolutely vital for your operation. How do pulse dust collectors manage this thick powder? They use high-pressure air bursts to knock caked dust off the internal filter bags.
When a pneumatic bulk truck pumps cement into your silo, it rapidly displaces a huge volume of air. This air must vent outward through the dust collector. However, if the filter bags are completely blocked, internal pressure spikes dangerously. Consequently, the emergency pressure relief valve will blow open violently. This failure releases a massive, illegal cloud of cement dust directly into the atmosphere.
To prevent this hazard, you must clean the filter bags regularly. Inspect the compressed air manifold feeding the pulse jet system. Are the electric solenoid valves firing in the correct, sequential order?
Typically, synthetic filter bags last between 12 to 24 months, depending on your daily cement throughput and operating conditions.
Inspecting Electrical Control Cabinets and Wiring
The electrical control cabinet is the operational brain of your entire plant. Therefore, keeping this sensitive cabinet clean and tightly sealed is completely non-negotiable.
Concrete batching plants naturally create heavy, constant vibrations. Over time, these daily vibrations slowly loosen the vital screw terminals on your contactors and relays. A loose electrical connection creates high electrical resistance. Consequently, this unnatural resistance generates extreme heat, which can easily start a devastating electrical fire.
Are the rubber door seals on your control cabinet fully intact? You must replace any cracked or hardened weatherstripping immediately. Furthermore, fine cement dust is highly alkaline. If this dust enters the cabinet and absorbs ambient humidity, it becomes electrically conductive, which will short out your main control circuits instantly.
Schedule a certified industrial electrician to perform a thermographic scan of the main panel every six months. This special infrared camera safely identifies hidden hot spots in the wiring before the components melt completely.
Evaluating Gearbox and Motor Health
The main gearboxes and electric motors drive the heavy mixing arms and long conveyor belts. These massive drivetrain components endure punishing torque loads every single day. How can you detect internal wear before a catastrophic failure stops production? You must monitor heat and vibration closely.
Think about the heavy planetary gear drives rotating the mixing drum on a concrete transit mixer. If those gears lose lubrication or develop worn bearings, the entire mechanism shudders and emits a loud grinding noise. Ignoring these clear signs always leads to a complete mechanical lockup. The main gearboxes on your twin-shaft concrete mixer will suffer the exact same fate if neglected.
First, inspect the large electric motors. Ensure the external cooling fins are completely free of hardened concrete splatter. If the fins are insulated by dried concrete, the motor cannot shed heat. As a result, the internal copper windings will overheat and melt.
Second, evaluate the main gearboxes for excessive vibration or abnormal noise. Listen closely for any high-pitched whining.
Finally, check the gearbox oil quality carefully. Drain a small sample of the thick gear oil and inspect it under bright light to check for destructive metal shavings.
| Component Assessed | Critical Warning Sign | Required Deep-Check Action |
|---|---|---|
| Electric Motor | External cooling fins are coated in hardened concrete. | Chisel and wire-brush the metal fins completely clean. |
| Main Gearbox | High surface temperature or loud internal whining. | Check oil level and take an oil sample for metal debris. |
| Drivetrain Bearings | Excessive vibration felt on the outer steel housing. | Use a digital vibration meter to diagnose bearing health. |
Conclusion
A concrete batching plant is only as reliable as the maintenance routine backing it up. By consistently addressing daily safety checks, monitoring the wear on mixing components, verifying scale accuracy, and prioritizing environmental controls, you drastically reduce the risk of unexpected downtime. Sticking to a structured checklist transforms maintenance from a reactive emergency into a predictable, manageable process that protects your equipment investment and ensures continuous production quality.