-
Whatsapp: +86 15938761000
-
Email: likang@shconcretemixer.com
-
Address: Shenglong Youyi City, Zhongyuan District, Zhengzhou City, Henan Province
-
Whatsapp: +86 15938761000
-
Email: likang@shconcretemixer.com
-
Address: Shenglong Youyi City, Zhongyuan District, Zhengzhou City, Henan Province

What is a Concrete Batching Plant Blade? Selection and Maintenance Guide
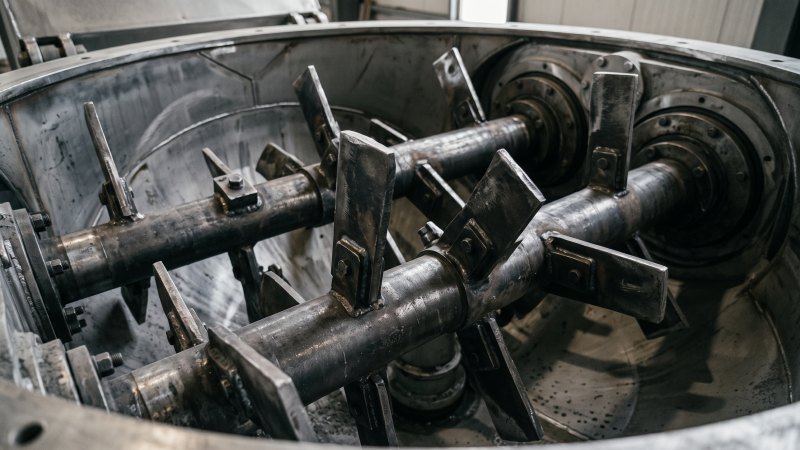
What exactly is a concrete batching plant blade, and why is it so critical to your daily mixing operations?
A concrete batching plant blade is a heavy-duty wear component bolted to the internal mixing arms of a twin-shaft or planetary mixer. It forcefully pushes, lifts, and folds raw materials like cement, water, and coarse aggregates to guarantee a uniformly mixed concrete batch. Selecting the correct blade material, recognizing wear signs early, and maintaining precise clearances directly prevents uneven mixing, reduces plant downtime, and lowers overall operational costs.
Comparing Common Manufacturing Materials
Why do some concrete mixer blades last for months while others wear out in just a few weeks?
The lifespan of a concrete mixer blade depends entirely on its base material. Selecting the correct metal balances your upfront costs with long-term wear resistance. The three most common materials are high chromium cast iron, high strength alloy steel, and traditional carbon steel.
To make the best choice for your plant, you must understand how these metals perform under stress. The table below outlines the primary differences between these options.
| Material Type | Hardness Level | Impact Resistance | Best Application |
|---|---|---|---|
| High Chromium Cast Iron | Very High | Low | Continuous, highly abrasive mixing |
| High Strength Alloy Steel | Medium-High | High | Mixes with large, sharp aggregates |
| Traditional Carbon Steel | Low | Medium | Temporary plants or short-term projects |

High Chromium Cast Iron for Maximum Durability
High chromium cast iron is the industry standard for high-wear environments. This metal typically features a hardness rating between 58 and 62 HRC. Furthermore, it contains roughly 15% to 27% chromium. Consequently, it offers exceptional resistance to abrasive materials like silica sand and crushed stone. Because actual hardness and chromium percentages vary by foundry, always verify the exact material specifications with your supplier before purchasing.
Think of a high chrome blade like the heavy-duty wear plates inside a primary jaw crusher. Both components are designed to grind against hard rocks all day without losing their shape. As a result, high chrome blades can often endure over 50,000 mixing cycles.
However, this extreme hardness comes with a trade-off. High chrome is relatively brittle. If a massive, unbreakable stone enters the mixer, the blade might snap instead of bending. Therefore, it is strictly meant for well-screened aggregates.
High Strength Alloy Steel for Impact Resistance
High strength alloy steel provides an excellent middle ground. Manufacturers create this metal by adding elements like manganese and nickel to standard steel. This process increases the metal’s overall toughness. Usually, alloy steel blades have a hardness of around 45 to 52 HRC.
Why choose alloy steel over high chrome? Alloy steel bends slightly under extreme pressure. It absorbs sudden shocks without shattering. You can compare this material to the blow bars in an impact crusher. Those bars must hit heavy rocks at high speeds without breaking apart.
Similarly, if your batching plant processes recycled concrete or inconsistently sized river rock, alloy steel is much safer. It handles the violent impacts of oversized aggregates perfectly. While it will wear down faster than high chrome, it prevents catastrophic blade failure during heavy-duty mixing.
Traditional Carbon Steel for Short-Term Operations
Is there ever a good reason to use a fast-wearing metal? Yes, traditional carbon steel still holds a place in the concrete industry. Materials like Q235 or standard mild steel are very inexpensive to produce. They are also incredibly easy to weld and modify on-site.
Carbon steel has a very low hardness rating. Because of this, abrasive sand will erode the blade quickly. Typically, a carbon steel blade shows severe wear after just 800 to 1,200 hours of operation.
However, carbon steel is perfect for short-term operations. Imagine standard mild steel temporary discharge chutes at a short-term construction site. You only need them to work for a few months. Similarly, if you are running a portable batching plant for a specific, short-duration road project, expensive high chrome blades are unnecessary. Carbon steel keeps your initial investment low while getting the temporary job done.
Recognizing Critical Wear Signs to Prevent Mixing Failures
How can you identify a failing concrete mixer blade before it ruins an entire batch?
You can identify critical blade wear by physically measuring the reduction in edge thickness. Furthermore, you must visually check for the loss of the protective built-up edge and actively monitor increases in mixing time. Recognizing these specific mechanical changes prevents incomplete blending and eliminates costly plant downtime.
The following table provides a quick reference for the primary wear indicators before we explore them in detail.
| Wear Indicator | Detection Method | Consequence of Ignoring |
|---|---|---|
| Edge Thickness | Digital caliper measurement | Structural blade snapping |
| Built-Up Edge | Weekly visual inspection | Rapid base metal erosion |
| Mixing Time | Control software tracking | Drastically reduced plant output |
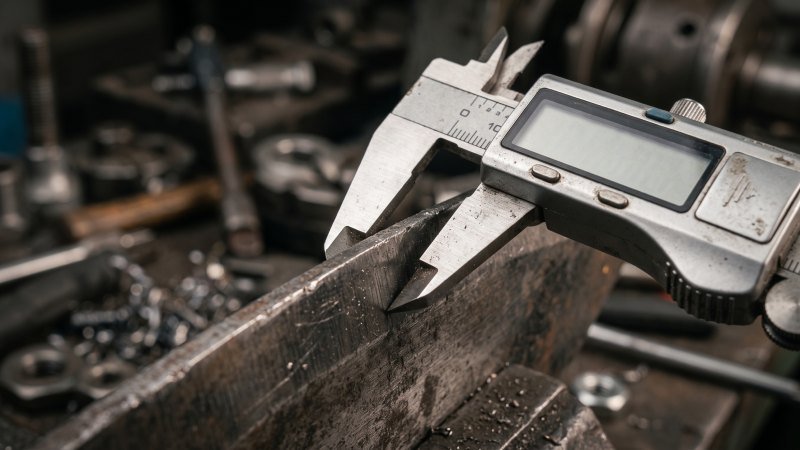
Measuring Edge Thickness Reduction
Most blades begin with a standard thickness between 15mm and 20mm. During daily operation, abrasive aggregates constantly grind against the metal. Consequently, this heavy friction shaves down the working edge over time. Therefore, you must measure the blade’s thickness regularly using digital calipers.
Generally, a blade requires immediate replacement when it loses 50% of its original thickness. Consider how a mechanic checks the wear limits on an excavator bucket tooth. Once the tooth wears past a specific measurement, it completely loses its digging power. Similarly, a thin mixer blade cannot push heavy concrete effectively. Ultimately, ignoring this measurement leads to severe mixing inefficiencies and potential blade breakage.
Identifying the Loss of the Built-Up Edge
Many premium blades feature a specialized built-up edge along the primary impact zone. Manufacturers typically apply a hardfacing weld to create this thick, protective ridge. Essentially, this built-up layer absorbs the heaviest impacts from large gravel and sharp rocks.
Over time, this raised profile flattens out completely. Consequently, the softer base metal becomes dangerously exposed to direct friction. Therefore, you must conduct visual inspections weekly to catch this specific issue early.
Think about the protective hardfacing applied to a bulldozer’s cutting edge. When that raised weld pattern disappears, the main steel body deteriorates rapidly. In the exact same way, losing the built-up edge on a mixer blade accelerates total part failure. Once that protective ridge is completely gone, the blade’s remaining lifespan drops drastically.
Monitoring Concrete Batch Consistency and Mixing Time
Mechanical wear directly impacts your daily production data. A healthy twin-shaft mixer normally produces a fully uniform batch in 30 to 45 seconds. However, worn blades cannot sweep the mixing trough completely. Consequently, material slips through the growing gaps between the blade and the liner.
Because the blades fail to move the material efficiently, the automated system must increase the mixing time. Therefore, if your standard mixing cycle suddenly takes 60 seconds or more, your blades are likely failing. Furthermore, you might notice unmixed pockets of dry cement or loose aggregate in the final discharge.
“When mixing time increases by just 15 seconds per batch, a plant producing 100 batches daily loses nearly 30 minutes of active production time.”
This situation is comparable to worn flighting inside a cement screw conveyor. If the screw flights wear down, the conveyor must run longer to transfer the same volume of cement powder. Always track your daily mixing times and batch uniformity. Ultimately, these performance metrics are the most reliable indicators of internal blade health.
Best Practices for Maximizing Service Life
Extending the working lifespan of your mixing equipment does not always require expensive material upgrades.
You can maximize the service life of a concrete mixer blade by strictly implementing high-pressure daily cleaning protocols and strategically optimizing the aggregate loading sequence. These operational adjustments prevent concrete buildup, reduce direct mechanical impact, and evenly distribute wear across all mixing components.
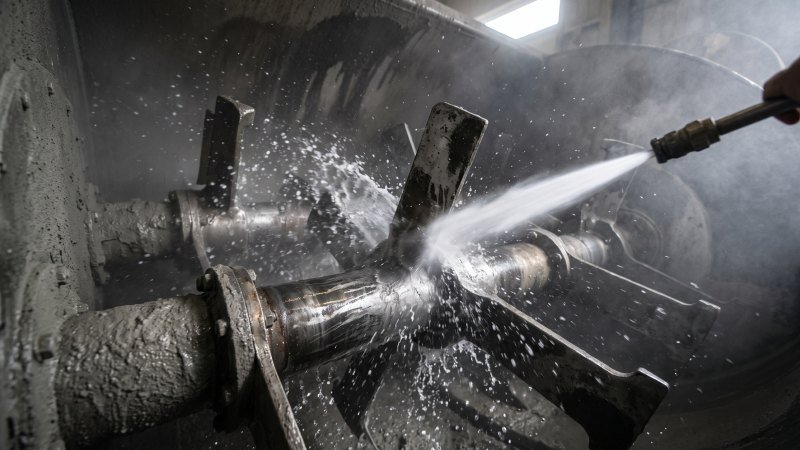
Implementing Daily Cleaning Protocols
Concrete hardens rapidly. When residual concrete cures on your blades, it effectively alters their aerodynamic shape. Consequently, the blade must push through the mixture with increased drag. This extra friction accelerates metal wear significantly. Therefore, a strict daily cleaning routine is non-negotiable.
First, operators must use high-pressure water systems to blast away wet concrete immediately after the final batch. Second, never use a sledgehammer to chip away dried concrete. Because materials like high chromium cast iron are brittle, a heavy hammer strike can easily crack the metal.
Think about a rotary valve in a cement silo. If cement dust compacts and hardens inside the valve, the rotor grinds against the housing, causing severe damage. Similarly, hardened concrete on a mixer blade creates abnormal friction zones that destroy the part prematurely.
“Plant managers who enforce a strict 15-minute end-of-shift washout protocol routinely report a 20% to 30% increase in wear part longevity.”
If your plant utilizes an automated washout system, water pressure requirements can vary depending on the mixer size. Always verify the recommended PSI range with your equipment supplier to ensure effective cleaning without damaging internal twin-shaft seals.
Optimizing Aggregate Loading Sequences
The way materials enter your mixer heavily impacts your blades. If large, heavy aggregates drop directly onto bare steel blades, the shock load is immense. Over time, this constant pounding causes micro-fractures. Therefore, you must optimize your loading sequence.
Instead of dumping dry rocks first, utilize a sequential loading technique. Introduce a portion of water and sand into the mixer initially. This creates a wet, cushioning slurry at the bottom of the trough. Afterward, you can add the heavier gravel and crushed stone. Ultimately, the slurry absorbs the kinetic energy of the falling rocks.
Consider how operators load an articulated dump truck. A skilled operator always places a layer of soft soil in the truck bed before dropping massive boulders. This soft layer protects the truck’s steel bed from denting. In the same way, a sand and water slurry protects your mixer blades from direct rock strikes.
| Loading Step | Material Type | Primary Purpose |
|---|---|---|
| Step 1 | Water and Sand (Partial) | Creates a protective bottom slurry |
| Step 2 | Coarse Aggregates | Reduces direct impact on bare blades |
| Step 3 | Cement and Remaining Water | Ensures thorough and rapid blending |
By simply reprogramming your batching plant’s control software to follow this sequence, you significantly reduce mechanical stress. This straightforward adjustment costs nothing, yet it effectively adds months to your blade’s operational life.
Essential Steps for Safe and Accurate Replacement
How do you successfully swap out a failing concrete mixer blade without risking worker injury or damaging the internal drum?
Replacing a concrete batching plant blade requires strict adherence to electrical lockout protocols, the careful removal of rusted wear parts using proper tools, and precise calibration of the clearance gap during installation. Executing these structured steps ensures operator safety, prevents severe mechanical collisions, and guarantees optimal material blending.

Preparing the Mixer and Safety Lockouts
Safety is the absolute priority before anyone enters the mixer drum. The internal environment of a twin-shaft mixer is extremely dangerous. Therefore, you must completely neutralize all power sources.
First, operators must execute strict Lockout/Tagout (LOTO) procedures. You must physically padlock the main electrical breaker panel. Consequently, no one can accidentally start the plant while maintenance is underway. Furthermore, always disconnect the pneumatic air supply to the discharge gates.
Think about a technician servicing a heavy-duty jaw crusher. Before climbing into the crushing chamber, the technician must physically isolate the motor drive. If the machine turns on unexpectedly, the results are fatal. Similarly, a concrete mixer drum is a confined space with heavy, rotating steel arms. You must guarantee total system immobilization before loosening a single bolt.
Removing Damaged Wear Parts
Once the environment is safe, you can begin the removal process. Mixer blades connect to the mixing arms using heavy-duty bolts. However, these fasteners operate in a terrible environment. Over time, concrete dust and moisture form a rock-hard crust over the bolt heads and threads.
Therefore, standard wrenches rarely work. Technicians usually rely on heavy-duty pneumatic impact wrenches to break the bolts free. If the threads are completely rusted or seized, you may need an acetylene torch. Carefully cut the bolt heads off. However, you must avoid cutting into the primary mixing arm. The arm itself is a permanent fixture and is expensive to replace.
This process is highly comparable to replacing the rusted track pads on a bulldozer’s undercarriage. In both situations, the fasteners endure severe environmental abuse and high mechanical tension. Ultimately, using penetrating oils beforehand and applying targeted heat will save you hours of physical labor.
Calibrating Clearances During Installation
Installing the new blade is not as simple as tightening the bolts. You must carefully calibrate the gap between the edge of the new blade and the internal mixer liner. This measurement is crucial for your plant’s efficiency.
Typically, this clearance gap should measure between 3mm and 8mm. However, this parameter can vary widely depending on the specific mixer model and liner thickness. Therefore, always verify the exact clearance specifications with your equipment supplier before finalizing the installation.
If you set the gap incorrectly, you will encounter immediate operational problems. Consider how technicians set the precise gap between the rotor and the anvil rings in a Vertical Shaft Impactor (VSI) crusher. If the gap is wrong, the crusher either jams or fails to break the rocks. The same mechanical rules apply to your mixer blades.
| Clearance Status | Operational Result | Long-Term Consequence |
|---|---|---|
| Too Wide (>8mm) | Coarse aggregates get trapped in the gap. | Deep grooves form in the expensive liner plates. |
| Too Tight (<3mm) | The blade directly scrapes against the liner. | Violent friction destroys both components instantly. |
| Properly Calibrated | Material sweeps cleanly across the floor. | Uniform concrete batches and maximized part lifespan. |
To achieve the perfect gap, loosely install the bolts first. Next, manually rotate the mixing shaft to ensure the blade sweeps smoothly across the lowest point of the trough. Once you confirm the correct measurement with a feeler gauge, securely lock the bolts to the required torque settings.
Conclusion
A concrete batching plant blade is much more than a simple piece of metal; it is the driving force behind your plant’s production quality and efficiency. By thoughtfully selecting materials like high chromium cast iron or alloy steel based on your specific aggregate types, you set a strong foundation for long-term durability. Furthermore, strictly monitoring wear signs and executing proper cleaning protocols will ensure you get the absolute maximum lifespan out of every component. When the time eventually comes for replacement, prioritizing safety lockouts and precise clearance calibration guarantees a smooth transition back to full operation.